


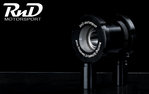
Home page Technical Anti roll bar droplink fiitting guide
Anti roll bar droplink fiitting guide
Start by lifting the complete front end of the car and removing both wheels. Use two axle stands to keep it there.
Remove both original droplinks, then we can get building the new ones.
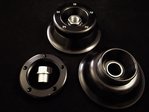
Take the rod ends and remove the locknuts. Take a dust boot. You need to insert the rod end into the dust boot, threading it first through one of the side holes, and then through the bottom hole. Push it right up the threaded portion until it will go no further. Turn the excess of the boot to lay in line with the rod end. Now you need to take a “boot horn”, a ball ended allen key does the trick (it is possible with your fingers, but can hurt!), and lever the boot over the rod ends radiused head, it should pop into place and be a nice tight fit. Be careful not to tear the boot with sharp tools. Wind the lock nut back on and repeat for the others.
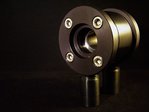
Now take one of the hexagonal aluminium bodies and wind one of each hand rod ends into either end. Using the originals for size, roughly set the length and finger tighten the locknuts. Try to ensure that there is an equal amount of thread into each end.
Push a short spacer down a bolt, large end first, until it sits against the underside of the head. Push this through the rod end followed by a long spacer, small end first.
Now go to the car and push the rest of the bolt through the upper mounting, on the shock absorber. Put a washer on the bit protruding, followed by winding a nut on.
Now repeat this for the bottom end, and tighten both ends upto the car. You may have to rotate the anti roll bar up or down to achieve this. Notice how much bind there is there, we are developing an improvement over the rubber bushes to reduce this.
Ensure that the steering is centered, otherwise the below method of aligning the rod ends will not work.
Figure out which direction you need to rotate the locknuts in to tighten them, they will both go the same way. You now need to twist both rod ends in this same direction, until they are twisted hard up as far as they will go. Grip the central bar with a 19mm spanner and tighten up one locknut at a time with another 19mm.
You should have now set the rod ends to allow maximum clearance, but to check this, lock the steering all the way over in both directions (carefully!) and check that they are not locked solid, ie there should be a small amount of side to side twisting movement still available. There isn't a lot of movement left over in them as these suspensions move through a very large angle, but there should be some, if set properly.
Be careful not to stress the joints by forcing full lock on improperly adjusted rod ends!
Now you need to build the other droplink, to the same state as before, and hang it on the car. We now need to take out any twist in the standard anti roll bar or mounting points. For a race car, with extremely stiff suspension, we would do this with the car sat perfectly level, at its ride height and at racing weight with it distributed evenly. But for most people, with soft (compared to race) suspension, having the shocks at full droop (wheels dangling) is close enough.
Nip up the upper mounting bolt. Now adjust the length of the droplink, by turning it in the appropriate direction, until the lower bolt fits perfectly into the lower hole. Push it through and nip it up too, tweeking the centre section until it is right in the middle of the slack.
Repeat the operation to align the rod ends for maximum clearance and lock them up.
Go around and tighten up all of the bolts.
Replace your wheels and lower the car back onto the ground. Don't forget to tighten your wheel nuts!
Take the car out for a spin, trying to work just one side of the suspension, to get the links working. Those “hump” type speed bumps are good for this, just go over one with only one side of the car.
Listen for any untoward noises whilst doing this. If there are any knocks or bangs, please check that you have adjusted the links to such a length as to allow clearance for the full suspension travel. Most of the time you should really keep them at standard length, as they were designed for all positions. As a reminder, these droplinks are designed to replace standard length ones only. If you need them any other length then please ask before ordering.
Now go forth and enjoy your new parts!
We recommend greasing all parts before assembly. Use some copper slip or similar on the rod ends threaded portion and bolts thread, and spray some PTFE lubricant (GT-85 isn't bad, full strength PTFE lube is better, a mixture even more so!) into the dust boots and onto the rod end bearings. This will extend the life, and make them easier to dissassemble when they do eventually wear out.
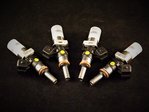
New rod ends, and all other parts, can be bought from us.
Many thanks for buying from us, we hope you enjoy your purchase!