


Promotional products
*
Prices incl. VAT
Home page Technical Fitting guide for Astra H rear beam bushes
Fitting guide for Astra H rear beam bushes
Here is the method of replacing the rear bushes that we have found most easy . The whole job should take no more than 3 hours to complete requiring only a range of torques bits , set of spanners , allen keys , a selection of chisels and a decent hammer .
Crack the rear wheel bolts off
Firstly jack up the rear end of the car and make sure you are happy with the way it is sat , be sure to use axle stands or a decent set of blocks as we cannot suggest you work soley from the jack .
Remove the rear wheels .
Support the rear beam with the jack and apply a little pressure , undo the bottom damper bolts . Release a little pressure from the jack and allow the rear beam to drop a little , now remove both rear springs . Re apply some pressure to the jack to align the damper bolt holes , wind the bolts back in and tighten them back up .
Its worthwhile taking some time to mark up the brackets that the rear beam bushes are held in , a decent marker pen will be fine for this - purely to aid you refitting it back on and getting the alignment somewhere close as a starting point .
Now slacken the two pinch bolts that go through the rear beam bush , one each side .Completely remove the nut if you like .
Slacken the bracket bolts each side and continue to wind them out making sure nothing untoward is going to happen , when all six bolts are removed the rear beam should hang there safely off the dampers
You may want to use a decent block of wood to allow the front end of the beam to hang down nicely , this allows you to continue working with ease .
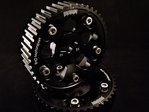
Its now time to remove the rear beam bushes , this is easy , be patient - they will come out .
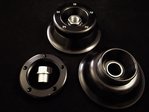
Looking at the bush , there will be a rubber/plastic cap on one side , this is the side you need to be on .
Once you have removed that it should look as below
Now Pick up your favourite chisel and hammer , and position the chisel on an angle such as below .
The idea is to collapse the outer aluminium housing allowing the bush to come free , work around the bush collapsing it in . You may also want to do the other side as well . Be careful to avoid damage to the bore in the rear beam as this is where your new bushes will fit . With a little patience the bush will come out , its recommended to put the kettle on after the first one is out !!
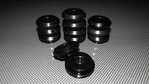
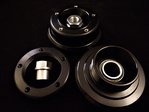
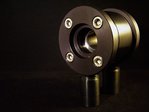
With both bushes out , take the RND rear bush and insert it from the inside of the car . The bush will only fit one way so you can't go wrong on this . It should look as below .
Both sides should now look the same , make sure all the M8 cap head bolts are nice and tight .
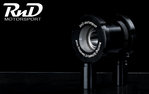
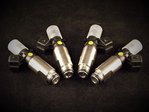
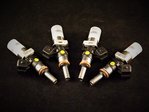
Take the axles and slide a seal over it , the thin portion of the seal should be facing the bearing and the small step on the axle should go into the bearing , it will not fit together any other way so again you can not go wrong .
Now take the bush brackets and slide them over the bushes as they were before , re insert the long pinch bolt as before also
Now continue to re assemble the rear beam as it all was before . Using the marks on the brackets that you made , align the rear beam up best you can before tightening the three bracket bolts on each side .
Ensure you also refit your rear springs !!
Its strongly recommended that you fully check all your rear end alignment as its easy to be a little out - the better this is set up , the better your car will feel
We hope this guide is useful for those who have purchased these rear beam bushes and also those who want insight to the task before purchase . As always with anything we do , please feel free to ask any questions you have.